Attaching the roof rack
WARNING Risk of injury by exceeding the maximum roof load
When you load the roof, the vehicle centre of gravity rises and the driving characteristics change.
If you exceed the maximum roof load, the driving characteristics, as well as the steering and braking, will be greatly impaired.
Never exceed the maximum roof load and adjust your driving style.
NOTE Vehicle damage from non-approved roof racks
The vehicle could be damaged by roof racks which have not been tested and approved by Mercedes-Benz.
Only use roof racks tested and approved by Mercedes-Benz.
Depending on the vehicle equipment, ensure that when the roof rack is fitted:
the sliding sunroof can be fully raised.
the boot lid can be fully opened.
Position the load on the roof rack in such a way that the vehicle will not sustain damage even when it is in motion.
NOTE Damage to the sliding sunroof when a roof rack is fitted
The sliding sunroof may be damaged by the roof rack if you attempt to open it when the roof rack is fitted.
Do not open the sliding sunroof when the roof rack is fitted.
In order to allow ventilation of the vehicle interior, you can raise the sliding sunroof.
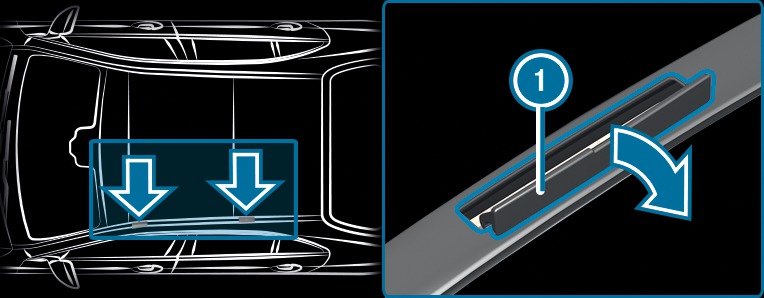
NOTE Damage to the covers
The covers may be damaged and scratched when being opened.
Do not use metallic or hard objects.
Fold covers  carefully upwards in the direction of the arrow.
carefully upwards in the direction of the arrow. Secure the roof rack to the anchorage points under covers .
. Comply with the roof rack manufacturer's installation instructions.
Secure the load on the roof rack.
Opening the stowage space under the boot floor
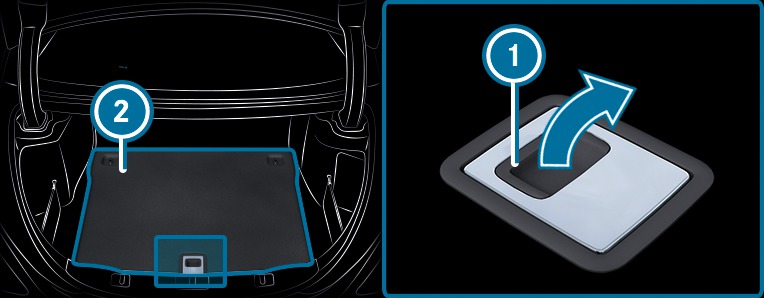
Pull boot floor  upwards using handle until it rests against the boot separator.
upwards using handle until it rests against the boot separator. 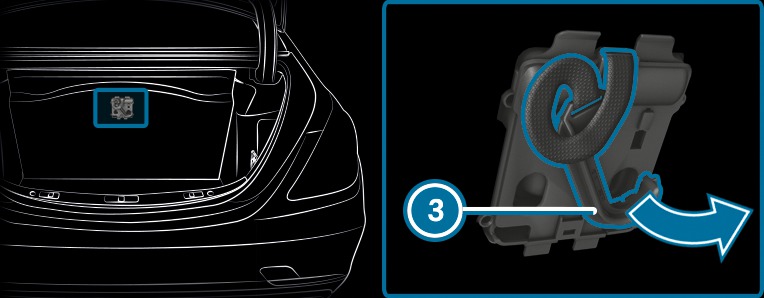
Fold out hook  on the underside of the boot floor.
on the underside of the boot floor. 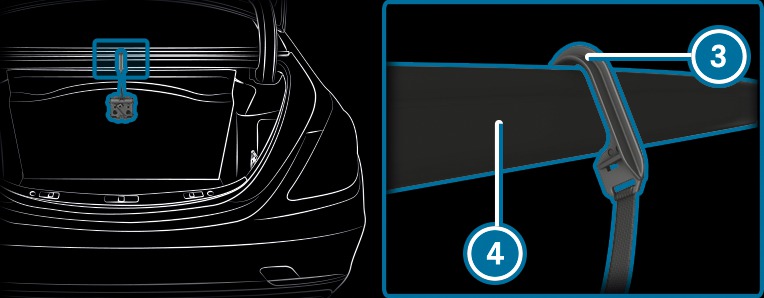
Clip hook into groove  .
.
into groove . Folding the ball neck out/in
WARNING Risk of accident due to the ball neck not being engaged
If the ball neck is not engaged, the trailer may come loose.
Always engage the ball neck as described.
WARNING Risk of injury from ball neck swinging outwards
The ball neck may swing outwards when unlocking or when it has not been properly engaged.
There is a risk of injury within the ball neck's range of movement!
Unlock the ball neck only when its range of movement is unobstructed.
Always be sure the ball neck is engaged when folding inwards.
Requirements:
Before folding the ball neck out/in, make sure of the following:
Shift the transmission to position
 or
or  .
. the range of movement is clear.
Only when folding in: ensure trailer cables or adapter plugs have been removed.
Folding the ball neck out
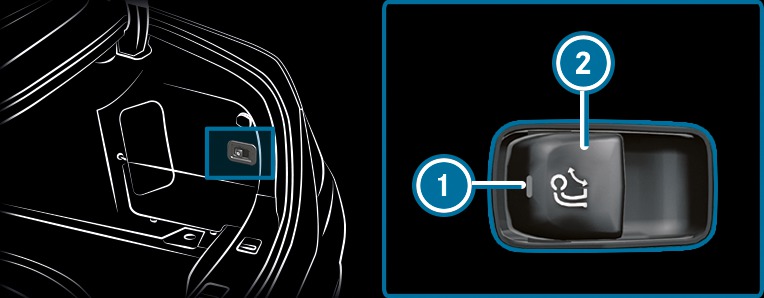
Pull release switch until the ball neck unlocks.
until the ball neck unlocks. The ball neck folds out from under the rear bumper.
Indicator lamp flashes.

Pull the ball neck in the direction of the arrow until it engages audibly in a vertical position.
Indicator lamp in the ball neck release switch goes out.
If the ball neck is not securely locked in place, the Check trailer hitch lock display message appears in the multifunction display.
Remove the cover from the ball head and store it in a safe place.
Make sure that the ball of the ball neck is clean. Check that it is either greased or dry (grease free), depending on the instructions for the trailer.
Folding the ball neck in
Pull release switch until the ball neck unlocks.
until the ball neck unlocks. The ball neck folds up under the rear bumper.
Indicator lamp flashes.
Press the ball neck in the direction of the arrow until it engages audibly behind the bumper.
Indicator lamp goes out and the message in the multifunction display disappears.
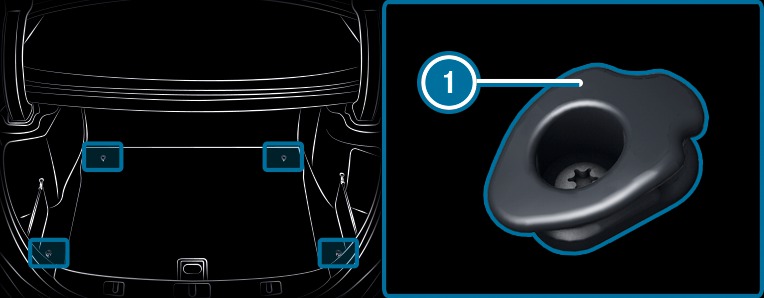
Luggage net hooks
Observe the following notes:
secure the load using the luggage net hooks.
do not use elastic straps or nets to secure a load. These are intended only as anti-slip protection for light loads.
do not route lashing materials across sharp edges or corners.
pad sharp edges for protection.
There are up to four luggage net hooks in the boot depending on the equipment installed.
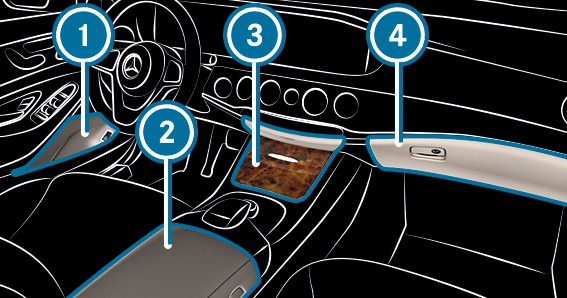
Overview of the front stowage compartments
WARNING Risk of injury from incorrectly stowed objects
If objects in the passenger compartment are stowed incorrectly, they can slide or be thrown around and hit vehicle occupants. In addition, cup holders, open stowage spaces and mobile phone brackets cannot always retain all objects they contain.
There is a risk of injury, particularly in the event of sudden braking or a sudden change in direction.
Always stow objects so that they cannot be thrown around in such situations.
Always make sure that objects do not protrude from stowage spaces, luggage nets or stowage nets.
Close the lockable stowage spaces before starting a journey.
Always stow and secure heavy, hard, pointed, sharp-edged, fragile or bulky objects in the boot.
Observe the notes on loading the vehicle.
Locking or unlocking the glove box
WARNING Risk of injury from incorrectly stowed objects
If objects in the passenger compartment are stowed incorrectly, they can slide or be thrown around and hit vehicle occupants. In addition, cup holders, open stowage spaces and mobile phone brackets cannot always retain all objects they contain.
There is a risk of injury, particularly in the event of sudden braking or a sudden change in direction.
Always stow objects so that they cannot be thrown around in such situations.
Always make sure that objects do not protrude from stowage spaces, luggage nets or stowage nets.
Close the lockable stowage spaces before starting a journey.
Always stow and secure heavy, hard, pointed, sharp-edged, fragile or bulky objects in the boot.
Observe the notes on loading the vehicle.
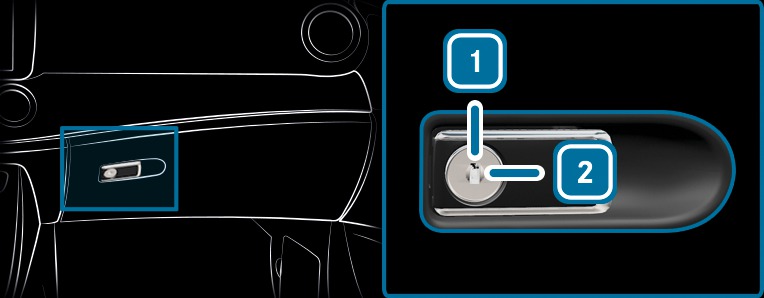
Turn the emergency key a quarter turn clockwise  (to lock) or anti-clockwise
  (to unlock).
(to lock) or anti-clockwise (to unlock). Opening the stowage compartment in the rear armrest
WARNING Risk of injury from incorrectly stowed objects
If objects in the passenger compartment are stowed incorrectly, they can slide or be thrown around and hit vehicle occupants. In addition, cup holders, open stowage spaces and mobile phone brackets cannot always retain all objects they contain.
There is a risk of injury, particularly in the event of sudden braking or a sudden change in direction.
Always stow objects so that they cannot be thrown around in such situations.
Always make sure that objects do not protrude from stowage spaces, luggage nets or stowage nets.
Close the lockable stowage spaces before starting a journey.
Always stow and secure heavy, hard, pointed, sharp-edged, fragile or bulky objects in the boot.
Observe the notes on loading the vehicle.
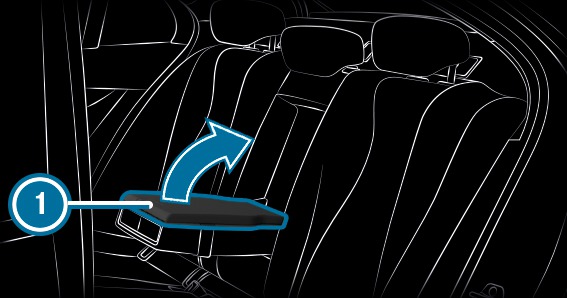
Vehicles with a rear bench seat
Fold down the rear armrest.
To open:
press release catch and swing the cover of the armrest upwards. 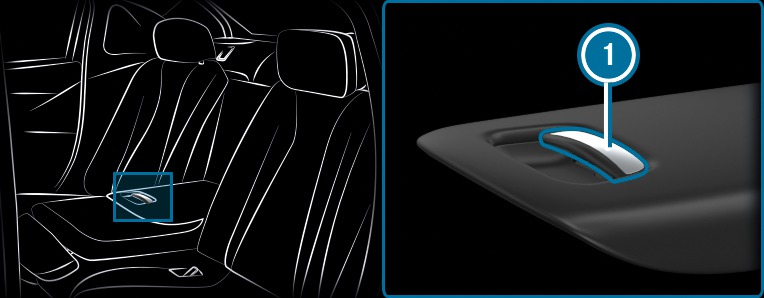
Vehicles with electrically adjustable outer seats
Fold down the rear armrest.
To open:
pull handle and fold the cover of the armrest upwards.